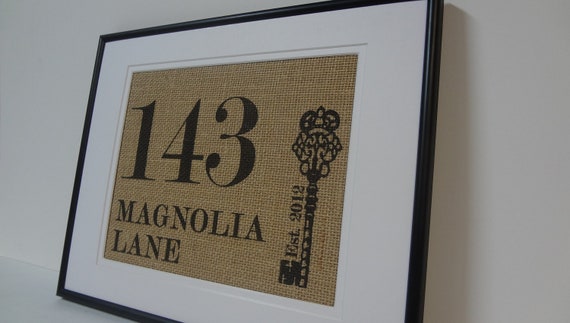
And thought, hmmmm.. wonder how I can make one of those. I came across a basic tutorial for a monogram burlap at My Love of Style. So I took what I needed and a great idea from a coworker to use my Cricut to stencil my smaller letters and was off running.
1. I started by cutting my burlap to the size of my glass.
2. I outlined the numbers and the key as seen below on my computer print out and then lined up my cricut-made "stencils" for the address portion. One helpful hint is that if you cannot see ALL of your design through the bulap, you can re-outline with sharpie- it helps SO MUCH!!
4. I cut out and put on a 2012 "stencil" and added some paint.
5. So here is a picture of everything completed , but when I tested how it looked in the frame, it needed a little more.
6. Since my piece really could benefit from a "mat" I cut a piece of 8x10 shimmery white cardstock into a 1/2" mat using a papercutter and just being REALLY careful. (sorry about the orientation of this picture- not really sure WHY, but blogger keeps flipping it when uploaded and I don't know what else to do for it. ) I did also use some spray adhesive on the mat to keep it stuck to the burlap
Have you ever tried burlap creations? If so, what have you done? I am addicted!!
Linking @


2 comments:
Very nice. This is something I would definitely make. I'm visiting from I Should Be Mopping The Floor's weekly linky party and am your newest follower. Would love it if you would stop by and visit me sometime.
http://www.laurieslittlebitsofcreativity.com/
@Laurie thanks so much for the wonderful comment and I will definitely come visit :) Thanks again!
Post a Comment