Monday, November 19, 2012

Home-made housewarming/ TUTORIAL!

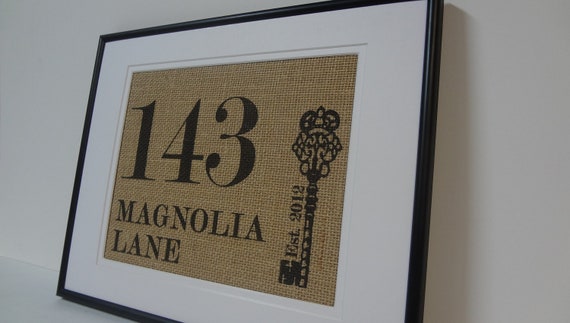
Hello everyone, hope you all had a fantastic weekend. As usual, mine was entirely too fast and I didnt get everything accomplished that I had hoped. On the bright side, Friday evening I got to make an idea come to life and it turned out GREAT! On a week's notice of a friends open house and not really having much moola or time to shop I thought I'd start looking for ideas that I could make my own. I really liked this cool idea I found on Burlapartbyelizabeth on Etsy.
Personalized Housewarming, Engagement, Wedding or Anniversary gift

And thought, hmmmm.. wonder how I can make one of those. I came across a basic tutorial for a monogram burlap at My Love of Style. So I took what I needed and a great idea from a coworker to use my Cricut to stencil my smaller letters and was off running.

1.  I started by cutting my burlap to the size of my glass.
2. I outlined the numbers and the key as seen below on my computer print out and then lined up my cricut-made "stencils" for the address portion. One helpful hint is that if you cannot see ALL of your design through the bulap, you can re-outline with sharpie- it helps SO MUCH!!


3. So next I patined in the numbers, key and stencil and then peeled up the stencil to reveal a fun looking letter!

I just loved it!! Then I remembered.. oh yea- I wanted to put the YEAR so they will always remember what year they bought their new house.

4. I cut out and put on a 2012 "stencil" and added some paint.

5. So here is a picture of everything completed , but when I tested how it looked in the frame, it needed a little more.


6. Since my piece really could benefit from a "mat" I cut a piece of 8x10 shimmery white cardstock into a 1/2" mat using a papercutter and just being REALLY careful. (sorry about the orientation of this picture- not really sure WHY, but blogger keeps flipping it when uploaded and I don't know what else to do for it. ) I did also use some spray adhesive on the mat to keep it stuck to the burlap


 7. Last but not least I placed it in the freshley painted frame I already had on hand and WALA! I included my original computer printout of the original idea I had some up with.. I think it turned out pretty darn great :)


Have you ever tried burlap creations? If so, what have you done?  I am addicted!!

Linking @

mop it up mondays feature

Friday, November 16, 2012

Banners, Blocks, and Blessings

I hope everyone is checking off things on their pre-Thanksgiving to-do list and still having some fun with crafting and decorating. I thought I would share the Thank
sgiving banner previously posted now that it is in its *rightful* place.


I really love how it turned out and guests to the house loved it, too! I made another one that I sent with my sister and a mini version for work. The letters and leaves we're cut from the cricut and the tags were cut with the Fiskars cutting system from way back when before I had a cricut... those older tools do come in handy at times. And on to the next piece of Thanksgiving goodness. I saw this awesome little project at Two Yellow Birds Decor and decoded I absolutely needed to male my own so I did!
They are very randomly sized mostly because these wood pieces were literally scrap and I left then whatever size they were. I painted them while a pizza was in the oven. While they were drying I toyed with letter and word sizing so once the buildings were dry, a little adhesive and they were ready to go! Now onto my last really easy little project. And by easy I mean EASY.
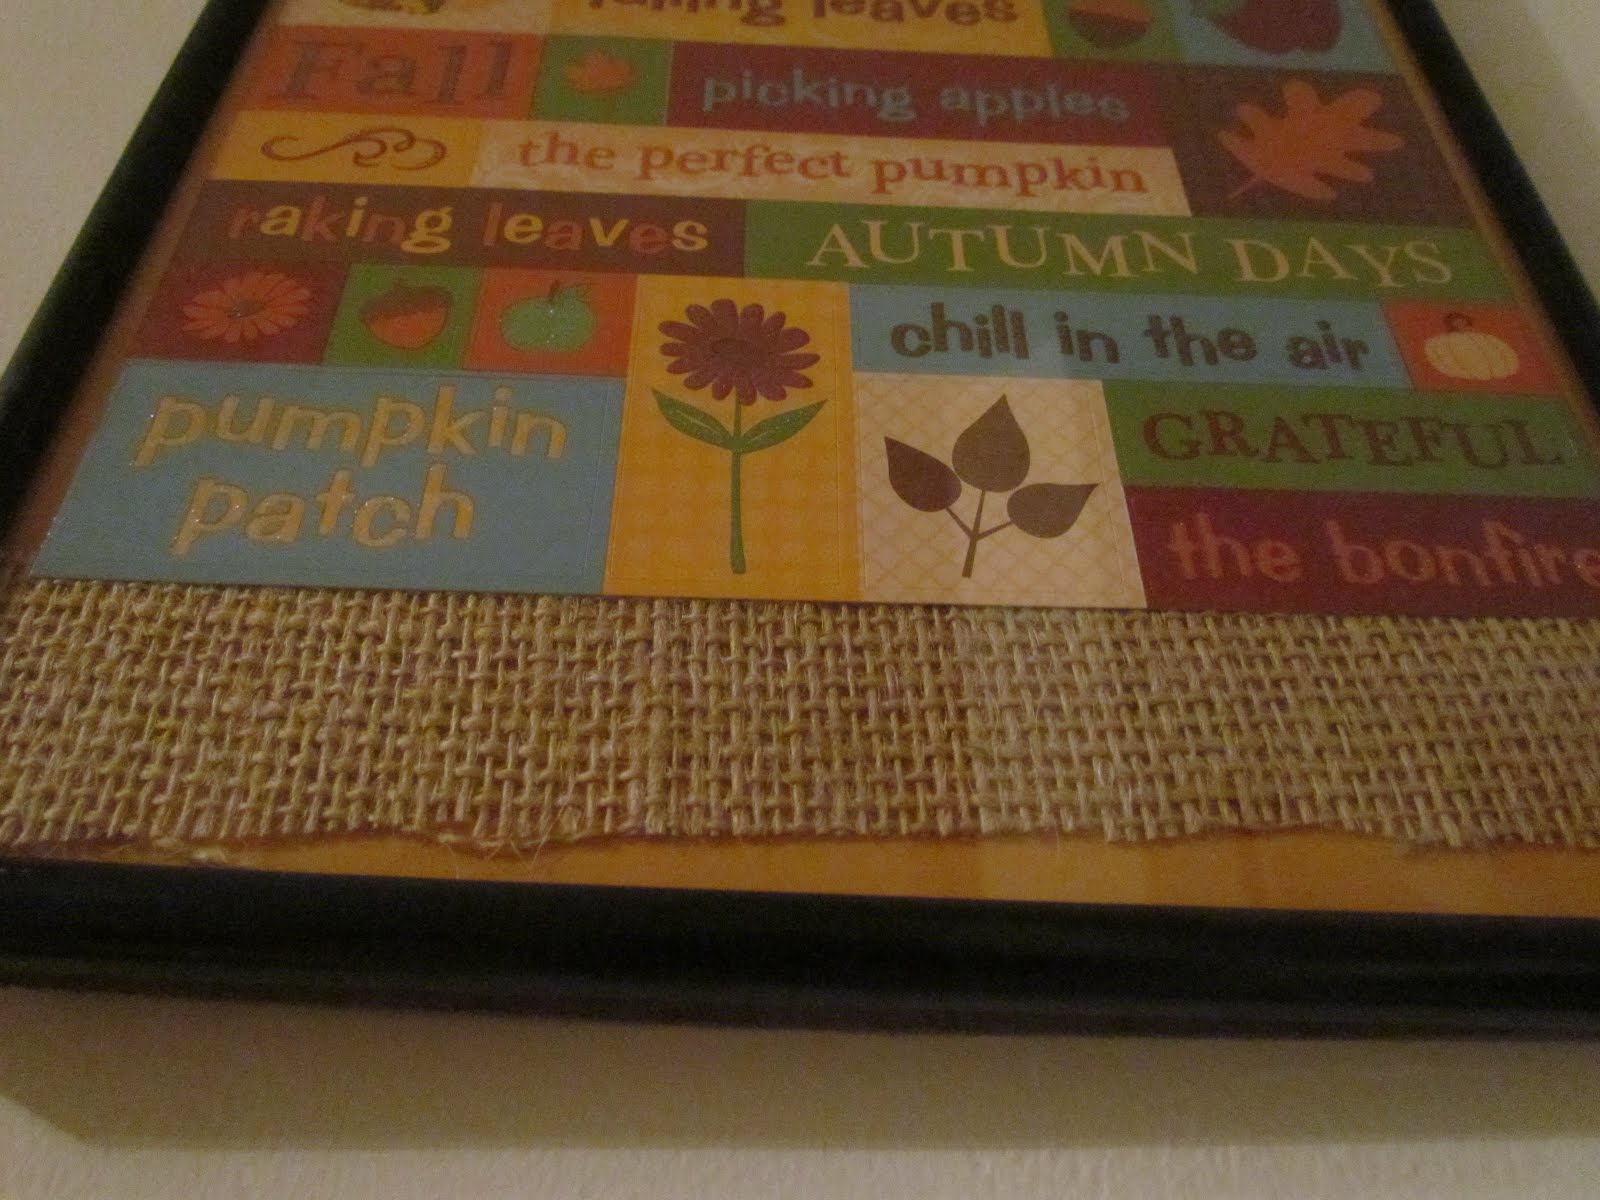
The big secret? All this is is a piece of cardstock, some scrap burlap and a sheet of stickers fromTarget dollar bins a year or so ago... And wala! Kinda cheating, huh? There are so many attractive subway art free printables, but or color printer is nugget and no time to get somewhere to print it... But love it anyway. Happy Friday! Going to link up a few places later but for now its shower and having to the bank before work. Have a great weekend :)


*ADDED* Linking up today @

 One Artsy Mama Blue Skies Ahead

Wednesday, November 14, 2012

I *LOVE* jars!

Hi everyone!!! I haven't had a ton of time to complete projects so far this week, or even post on the things I have been working on, but I have a few minutes and some photos I took on my phone so I thought'd I'd do a quick share.
After my sister was at my house, she made the request of a jar to hang in her bathroom like I did. (Sorry, I don't have a picture- will add later!!) I reminded her how simple it would be for her to create her own, but she would rather recieve it from me. That being said, I was headed to Joann Fabrics yesterday anyway and saw the cute little mason jars and grabbed a few. I had been meaning to try out the whole lotion/soap dispenser thing anyway.  So last night at something like 10:00pm I whip out the needle nose pliers and one of those hole starter things. (no pictures of the steps either because I was winging it based off a few things I saw browsing online.)
So here is the 1st finished product.
And I say 1st finished product because I was so super excited that it worked out like it was supposed to that I very nicely placed it in my kitchen and thought that this would be perfectly sufficient. I went upstairs and began to work on something else when I remembered I had braided some old tshirt fabric and soaked in tea, oh about a month ago, and the strips were still hanging in my craft room waiting to be made into flowers. I got to thinking how cute it would be on the jar and with a little plaid ribbon and a button.

Enter real finished product with fun effect on my cell phone camera. I do have ACTUAL camera pictures too, just not available now and I really felt the need to post since it has been a few days and I am just ticked with this finished product.

Might be doing a few of these for gifts this year- in addition to the ever growing other things on my "to make" gift list!! Have fun :)

Tuesday, November 13, 2012

My first guest post!!

Hi everyone, today I am guest poster over at Shaken Together and I could not be more thrilled :)
She is featuring someone new each Tuesday this month and some of December with some awesome handmade gift giving ideas.

I will hopefully be back tomorrow with the promised thanksgiving blocks and some other fun ideas.

Saturday, November 10, 2012

Slow week

I don't know about anyone else but this week has not been a good one for completing my craft to do list. I tried a few things that didn't work out and am still in the working phases of lots more. Either way I do have a second Thanksgiving banner to share. The first was just to understated for where it was hanging and after making letters for my crafty neighbor, I was even more unsatisfied. So today I present to you, more banners!
The first picture includes one for me and one for my sister. The second is mini that I hung on the outside of my cubicle at work. Got lots of compliments on the overall look but specifically the "rustic" colors. I hope everyone else is having fun prepping for there holidays. By the looks on pinterest and sites I follow, you are! Have a great weekend and maybe I will be back with another post later... * crosses fingers *